This is a short post to help anyone who may have been temporarily stumped trying to enable per-VM EVC for VMotion between clusters.
If you want to know more about per-VM Enhanced VMotion Compatibility, check out the VMWare KB HERE
Your business. Connected. Secure.
This is a short post to help anyone who may have been temporarily stumped trying to enable per-VM EVC for VMotion between clusters.
If you want to know more about per-VM Enhanced VMotion Compatibility, check out the VMWare KB HERE
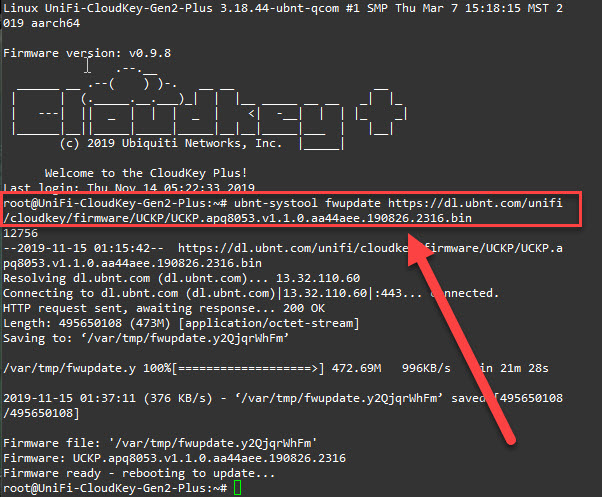
I was recently working on a UniFi deployment which included a UniFi cloud key gen 2 plus. The cloud key came from Ubiquiti with firmware version 0.9.8. Attempting to update the firmware resulted in the error “something went wrong” without getting past 1% on the progress.
Updating the controller and protect software was successful, but attempting to update the cloud key firmware from within the network application also failed.
When deploying VMWare VCSA in a lab environment the installer often gets stuck at stage 2 starting services. In my case, starting authentication network 2%. This seems to be an issue with VCSA wanting to verify the SSO domain through DNS resolution.
The solution for me was to create an entry in the hosts file of the VCSA appliance through SSH to the CLI. Before doing so, it is best to start from scratch. Delete the partially deployed VCSA appliance. Deploy VCSA through Stage 1 but do not enter Stage 2.
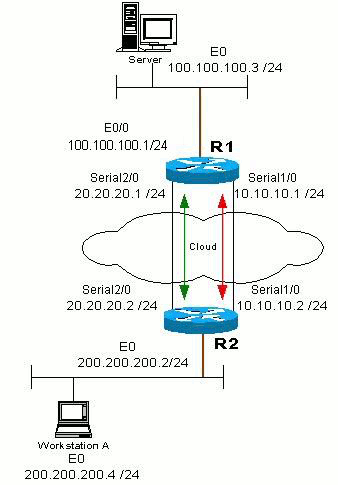
interface GigabitEthernet0/0.4
encapsulation dot1q 4
ip address 10.2.1.1 255.255.255.0
Testing with https://www.testconnectivity.microsoft.com/ shows green across the board. If you are dealing with this issue, start with this tool and run the following tests:
Testing with Microsoft Lync Connectivity Analyzer showed ready for 2013 mobility client.
After examining the Lync Front End server event log, I found event 32054, LS Storage service:
Storage Service had an EWS Autodiscovery Failure. The underlying connection was closed. Could not establish a trust relationship SSL/TLS.
The issue would seem to be the published autodiscover Uri for Exchange not matching the installed certificate on the Exchange 2016 DAG members. The Uri in the event log was reporting autodiscover.domain.local. The certificates and all other services in the infrastructure were pointing to autodiscover.domain.org. On the Exchange server, running powershell Get-ClientAccessService | fl AutoDiscoverServiceInternalUri will display the currently assigned URLs.
Issuing a Set-CsClientAccessService -Identity exchange.domain.local -AutoDiscoverServiceInternalUri https://autodiscover.domain.org/Autodiscover/Autodiscover.xml for both servers in the Exchange DAG solved the mobility client address book issue.
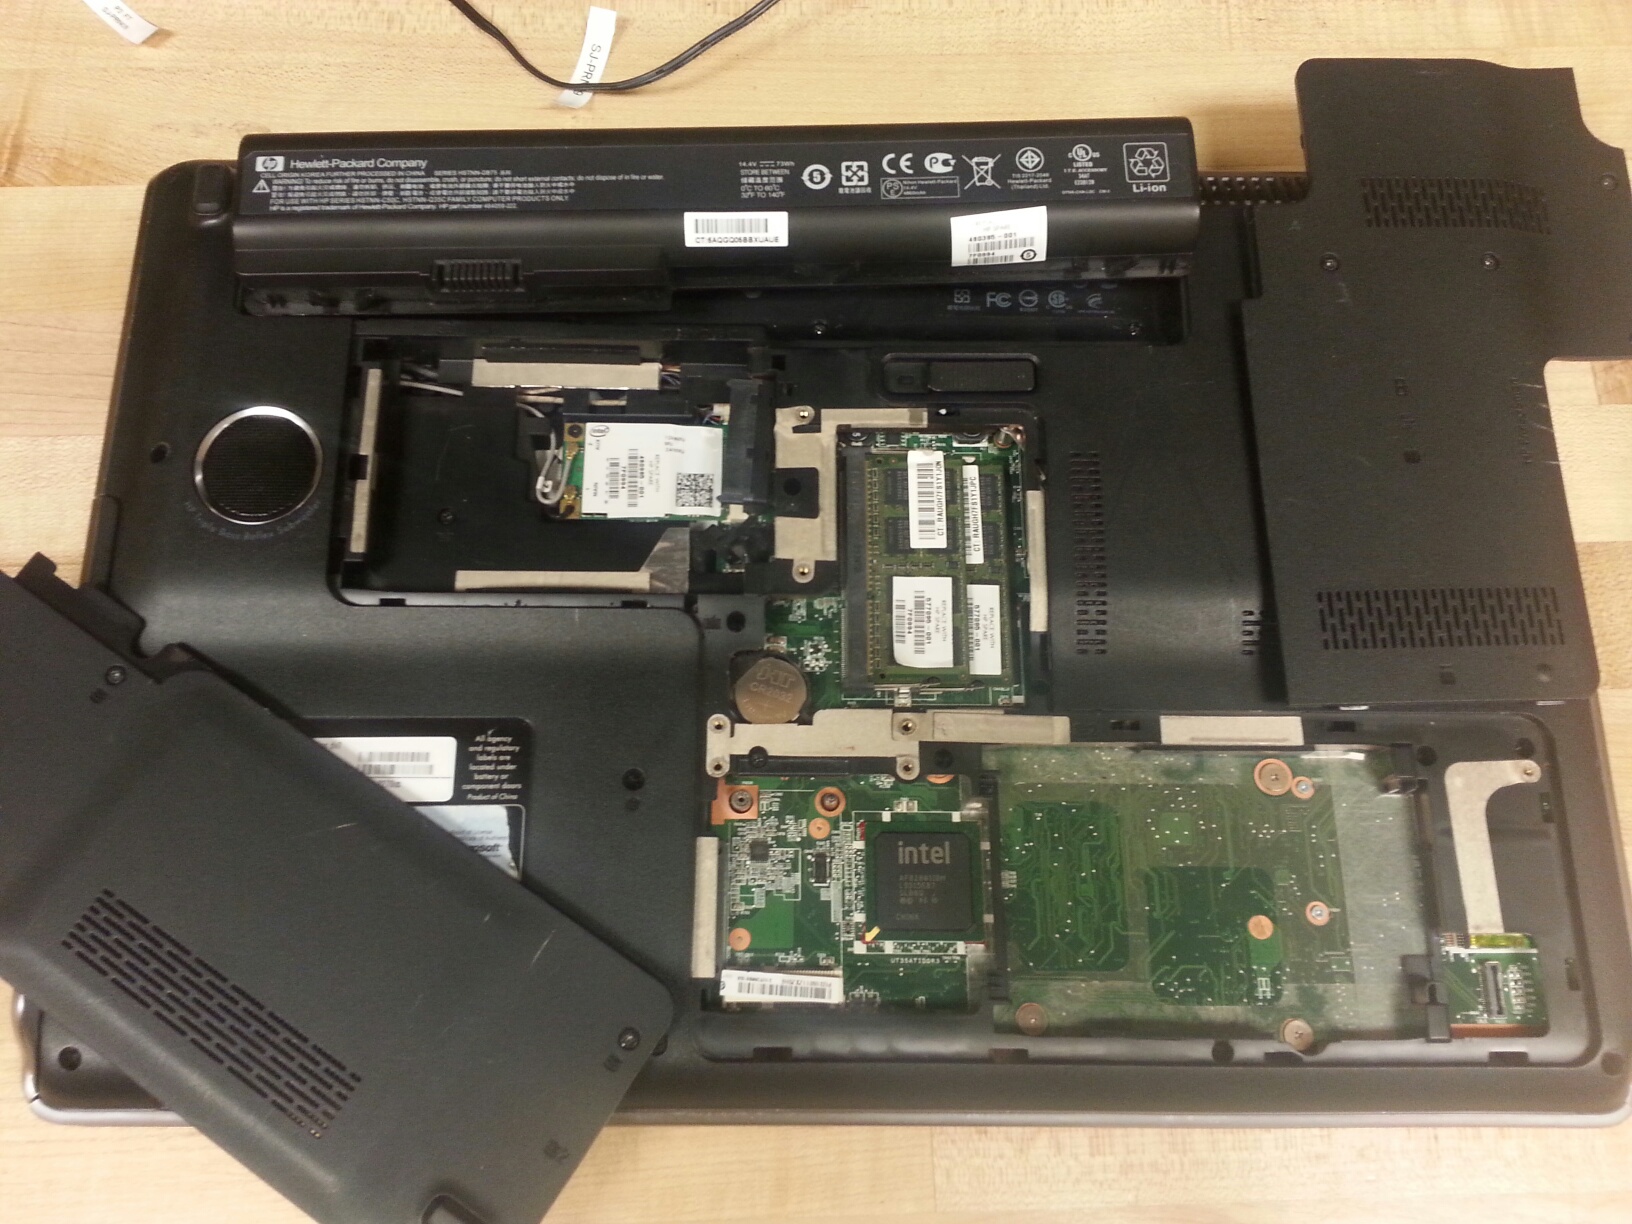
First off, you need to remove the physical hard drive from the device. You will want the primary (boot) disk. You may also need the secondary hard drives if you installed critical apps in non-standard locations.
Second, you need a hard-drive caddy of some sort. Something like this: http://www.newegg.com/Product/Product.aspx?Item=N82E16817270043 would work just fine. Any enclosure will due.
Third, you need a working computer to plug the enclosure in to. This will mount the OS drive as an external drive on the chosen machine. We need to convert this drive to a format virtualization programs will understand. The most common of which is Virtual Hard Disk (VHD/VHDX) format. To do this, we need a program like Disk2vhd http://technet.microsoft.com/en-us/sysinternals/ee656415.aspx
Run Disk2vhd, check the appropriate partitions from the connected external drive. Choose a location with enough space and name your VHD. Un-check VHDX if you intend to use VirtualBox as the VM player.
Once the VHD is created, install a VM player. I will be using VirtualBox in this example.
Run VirtualBox and create new VM. Choose the OS settings from the drop downs. This must match the version of the OS that was running on the old machine. If you don’t know the exact version, one way to check is to inspect the ntoskrnl file under /Windows/System32/, look at details and find the product version number. Reference the version number here: http://msdn.microsoft.com/en-us/library/windows/desktop/ms724832%28v=vs.85%29.aspx and here: http://www.gaijin.at/en/lstwinver.php
Select your memory amount and boot the VM. The old OS should boot fine and install all new drivers needed. You may need to perform some system repair, or OS repair due to driver conflicts but most of the time the boot is clean.
This seems to be related to left over Exchange attributes in Active Directory. I tried everything from a multitude of TechNet articles including the following:
Finally I tried just creating another user account in AD and gave it permissions to manage Exchange by adding it to the group ADUC–>Domain.local–>Microsoft Exchange Security Groups–>Organization Management.
That allowed access to the ECP and after some more digging in ADSIedit, I can see old exchange attributes attached to the enterprise Administrator account. I believe this is the problem as the management console lists Administrator as already having a “legacy” mailbox. The attributes are referencing exchange servers that no longer exist in the environment.
I plan to start ripping out old exchange attributes to test this theory.
Lots of websites describe the method for removing ADCs from AD using ADSIedit.
Open ADSIedit
Expand Configuration –> Services –> Microsoft Exchange –> Active Directory Connections
Delete ADC under Active Directory Connections
Replicate changes to all Domain Controllers
Running the Schema prep another time results in the same error:
After some digging we found the rogue connector buried in Active Directory Sites and Services.
Open the sites and services mmc and look for any machines that aren’t active servers. Delete anything that doesn’t belong and run the tool again. It should finish successfully.