Continuing from my previous post on integrating an existing Polycom system with Microsoft Lync 2010, I will run down the process for integrating a Polycom RMX bridge. The process is much more difficult than integrating the Polycom endpoints as it requires creating a trusted application within the Lync server, running some shell commands, generating certificates and RMX configuration changes. Once the integration is complete you can create SIP enabled meeting rooms accessible by Lync users and Polycom endpoints alike.
1. DNS – Making sure the Lync server can contact the RMX by name
Head over to the RMX admin console, under rarely used, find IP Network services. Go to the properties of the management network, and click the DNS tab. Fill in the name, domain, and DNS server fields.
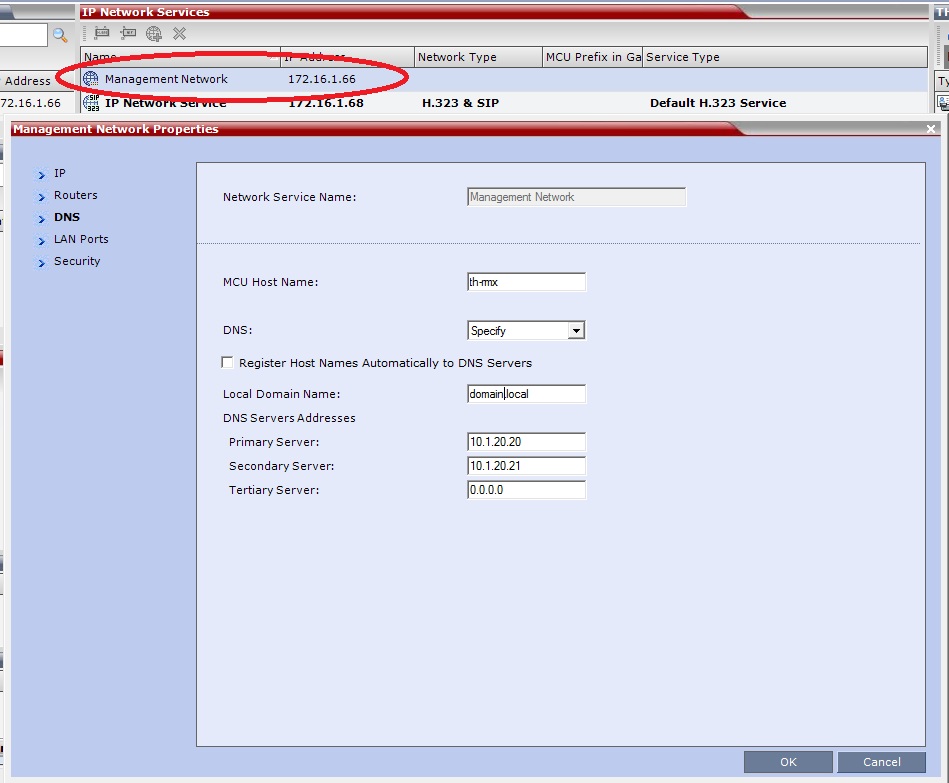
When the setting is changed, the RMX will need to reboot. Unfortunately you will be rebooting the RMX a LOT throughout this process.
Next we head over to your DNS server and create a static DNS record in the primary domain lookup zone, and the primary SIP domain lookup zone (these may be the same depending on your Lync deployment). Create an A record using the name you chose in the previous step, that points to the signaling IP of the RMX (not the management IP).
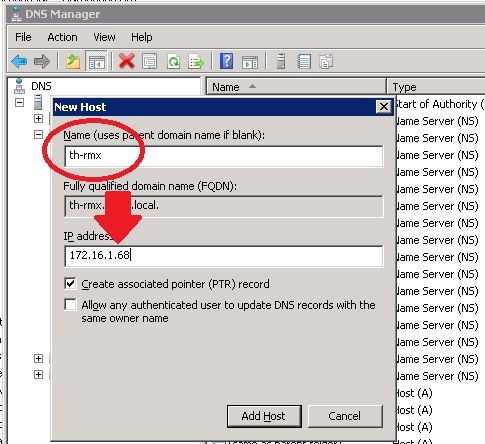
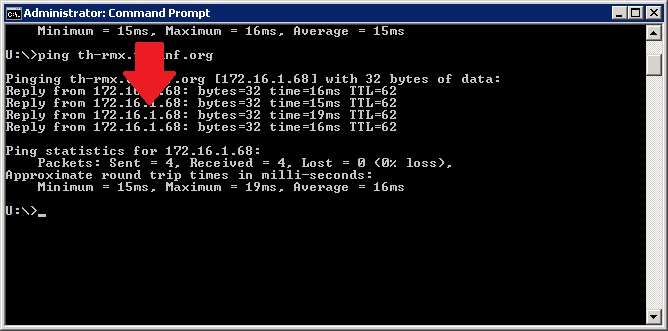
I will have created a record for domain.local and domain.org (SIP domain). You will want to test your DNS settings using nslookup and by pinging the FQDN of the RMX from the Lync 2010 server.
2. Creating a trusted application pool on the Lync server
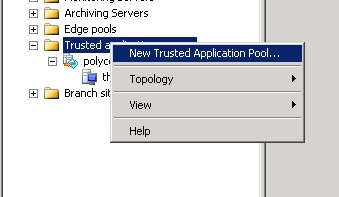
Head over to the Lync 2010 server and fire up the topology builder. We want to create a trusted application pool for the RMX. Polycom and Microsoft reccomend using a pool as best practice to allow for future expansion. If you add another RMX in the future, users can simply dial the pool name. Expand the trusted application pool tree, and chose new application pool.
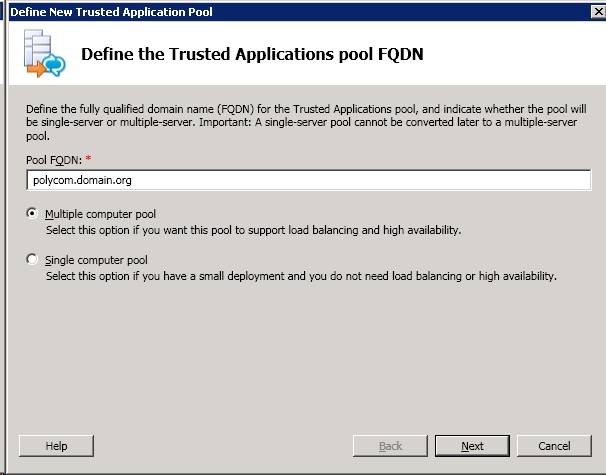
Chose a pool name (this does not have to resolve in DNS, and is for organization and dialing purposes within Lync only). Make sure to select multiple computer pool even if you only have on device at this time.
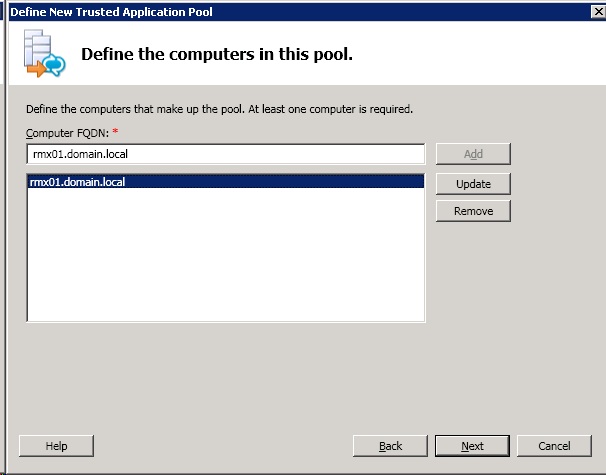
Next you need to define the computers in the pool, in this case you want to use the FQDN of your RMX bridge.
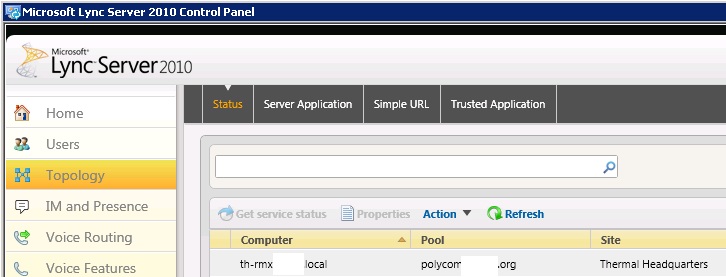
Publish the topology once you are done configuring the pool. Note that you will get an error about the RMX not being a domain member. You can ignore this. Open up the Lync 2010 console and check your topology tab. Make sure the new computer and pool is listed. You will see a red X on replication (this is normal).
Now we need to run some shell commands to make RMX a trusted host.
$route=New-CsStaticRoute -TLSRoute -Destination “th-rmx.domain.local” -port 5061 -matchuri “polycom.domain.org” -UseDefaultCertificate $true
Destination = The RMX computer
MatchURI = The pool name
Now we need to SET the route we just added:
Set-CsStaticRoutingConfiguration -Identity global -Route @{Add=$route}
Next we need to create the trusted application:
New-CsTrustedApplication -ApplicationId polycom -TrustedApplicationPoolFqdn polycom.domain.org -port 5061
ApplicationID = Any simple name, this does not matter
TrustedApplicationPoolFQDN = The pool name we created in the Lync topology
Finally, we need to update the topology:
Enable-CsTopology
Double check your Lync 2010 console under topology and the trusted application tab.
3. Certificates – Self Signed
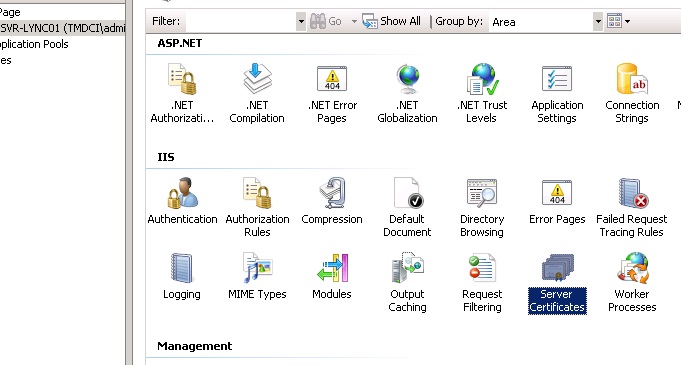
Head over to the IIS manager on the Lync 2010 server. On the root server, click certificates.
Once in the certificate manager select create domain certificate.
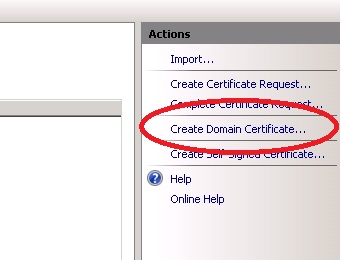
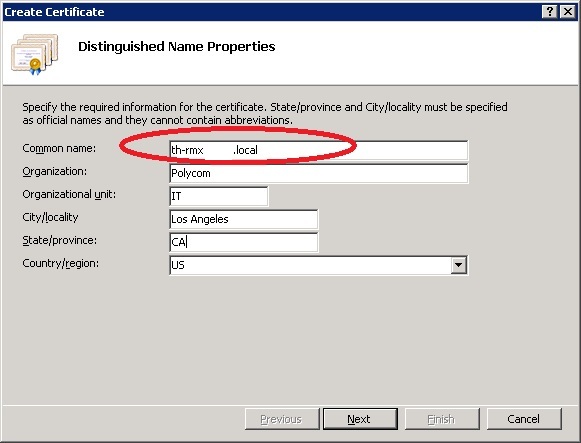
Fill out all the required details, and make sure the common name is the FQDN of the RMX.
On the next screen you will pick your internal CA, and chose a friendly name (this can be anything). When the wizard is complete you should see your certificate in the list. Close the IIS manager.
Go to start –> Run. Type “mmc” and hit enter.
Chose File –> Add/Remove Snap-in
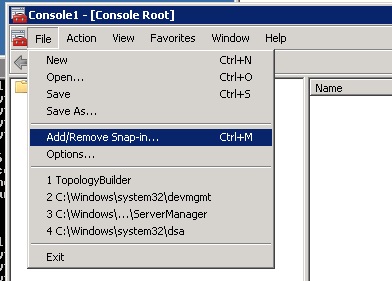
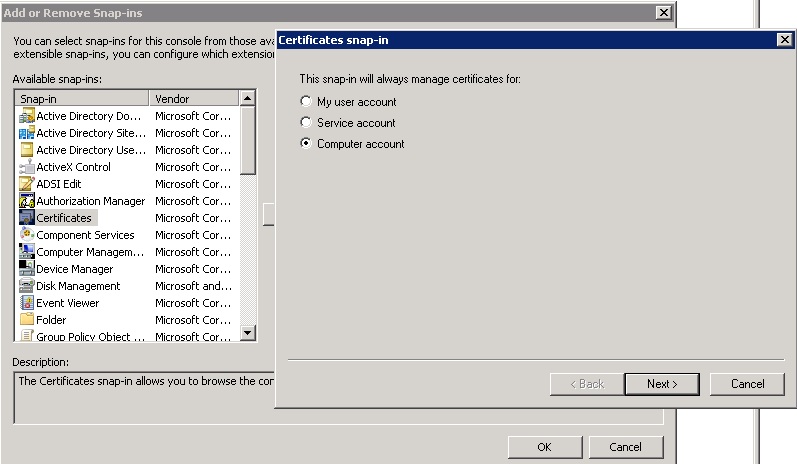
Select certificates from the list and click “Add->”. When prompted, select “computer account”.
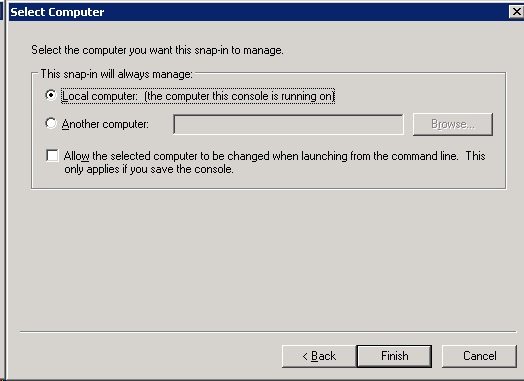
On the next screen select Local Computer.
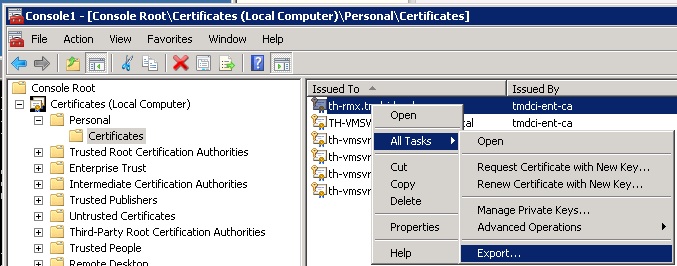
Expand the tree, click Personal –> Certificates. Find the certificate you created earlier, right click and select All Tasks –> Export.
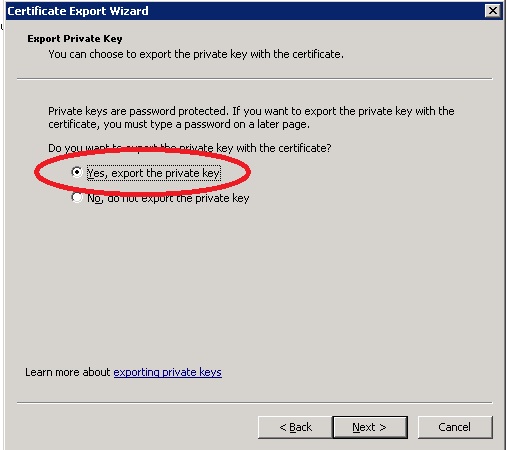
Click Next, when prompted, chose to export the private key.
On the next screen, be sure to check include all certificates in the path.
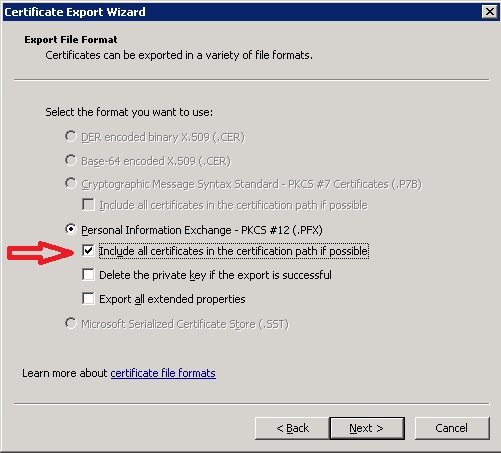
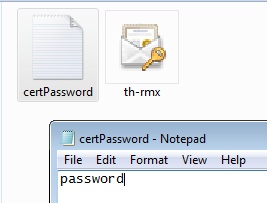
You will be prompted to enter a password. Chose a strong password and continue. Export the certificate. In the directory where you exported the certificate, create a text file, name it certPassword.txt, type the password you created earlier in this text file and save it.
4. Setting up the RMX and importing the certificate
Open up the RMX manager again. Click IP Network Services, right click IP Network Service and chose properties. Make sure IP network type is set to H.323 & SIP.

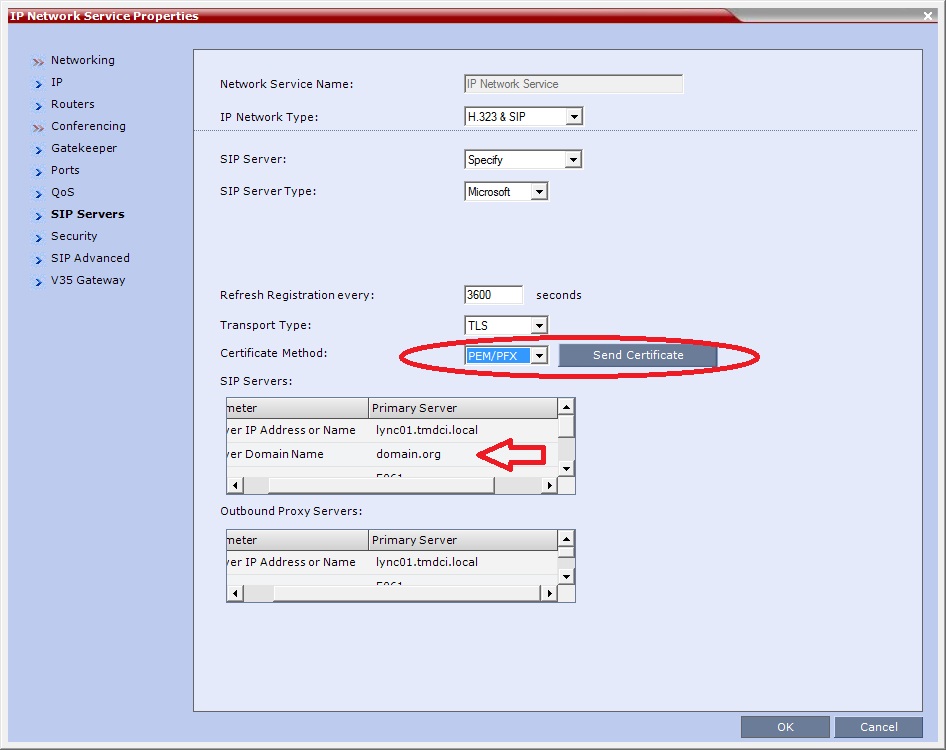
Click on the SIP Server tab. Select Specify server, then chose Microsoft. Fill in the server details. Server IP address or name should the FQDN of your Lync 2010 front end server. Port should be 5061. IMPORTANT: The Domain field should be your PRIMARY SIP domain name. Chose PEM/PFX from the certificate drop down menu. Click Send Certificate.
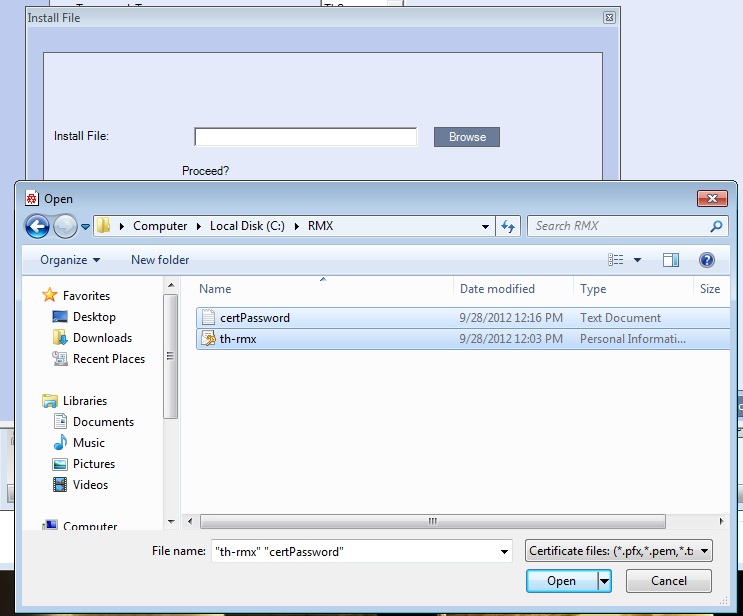
After clicking Send Certificate, click Browse, and select BOTH the certificate file and the password file we created earlier. Finish the wizard to complete the certificate import.
You can check the status of your configuration once the RMX reboots by clicking on Signaling Monitor, then properties, SIP Server. You should see status “OK”
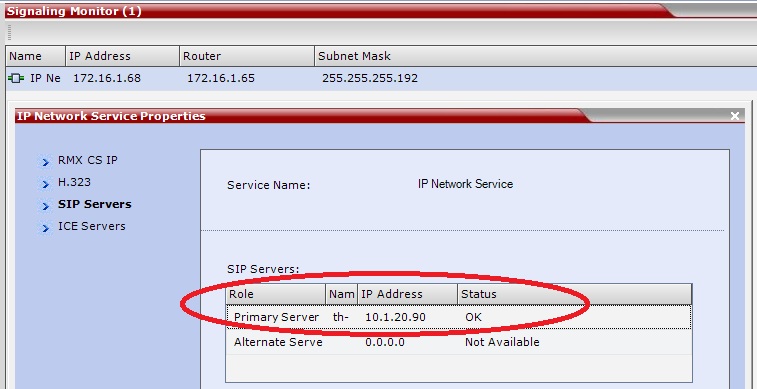
5. Testing configuration
You can test your new application pool by dialing one of your existing meeting rooms from Lync. As an example we will dial 1001@polycom.domain.org.
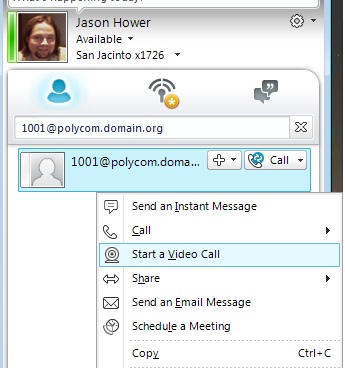
You should dial in to the RMX meeting room and be prompted according to how you have the room configured in the RMX.
I ran in to some difficulty here because Lync wants to force encryption. Originally my calls to the meeting rooms were failing due to crypto negotiation. If you aren’t using encryption in your existing meeting rooms, you will need to create a new one that allows encryption. The error messages Lync gives is not descriptive, so this took me a bit to figure out. I was forced to review the SIP stack logs on the Lync server to find the problem.
6. Making it easier to use
We don’t want users being forced to type “meetingID@poolFQDN” to get access to the meeting rooms all the time. There are several ways to make the rooms show up as users in the Lync clients AND in the Global Directory on the Polycom Endpoints.
The first is to create an AD contact object, edit the attribute field msRTCSIP-PrimaryUserAddress with “sip:meetingID@poolFQDN”. This contact will trickle down to Lync and users will be able to call the room. This method will work, but it isn’t a complete solution in my opinion.
7. Creating SIP enabled meeting rooms
Instead lets create a couple of SIP Polycom meeting rooms. First off, head over to AD and create a new user. Call it Polycom Room1, with a login name of polycomroom1@domain.local. We also add this account to an active directory group along with the HDX accounts for pushing to users contact lists in the future.
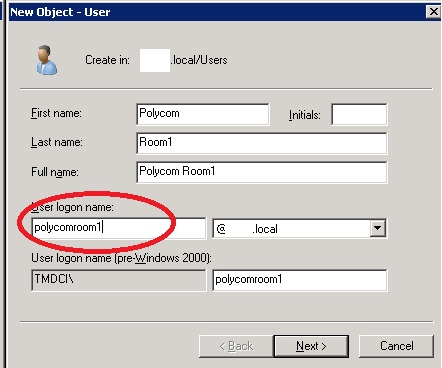
The login name will be important when we head back to the RMX configuration.
Head over to the Lync 2010 shell, and enable this new user in Lync.
-EnableCsUser -Identity “Polycom Room1” -RegistrarPool lync01.domain.local -SipAddressType SamAccountName -SipDomain domain.org
Again, we usually include an AD photo attribute that makes the meeting room stand out from normal users:
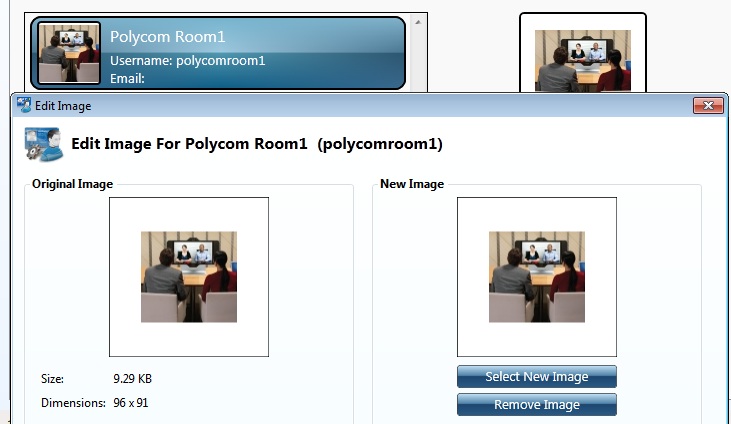
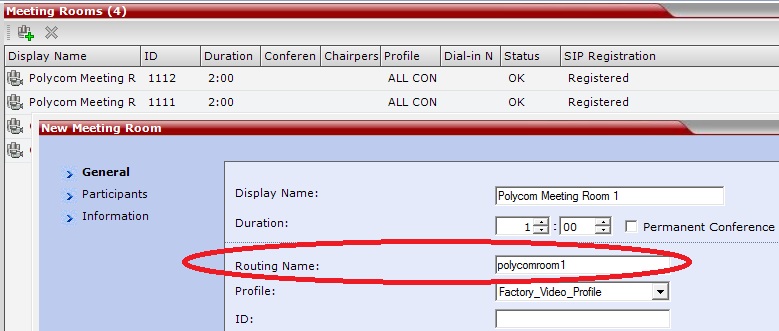
Head back over to the RMX, click on meeting rooms, then select New Meeting Room. Give the room a name, and pay attention to the “Routing Name” field. This corresponds directly with the LOGIN name we gave the Lync enabled AD user earlier. Make sure it matches exactly. Pick any ID as long as it is unique.
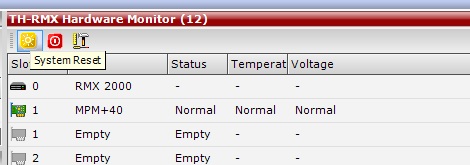
Once the meeting room is created, click on Hardware Monitor, then click the yellow reset button to bounce the RMX.
Once the RMX comes back up, the meeting room should register with the Lync 2010 server. To check it head over to meeting rooms, and you should see SIP “Registered”.

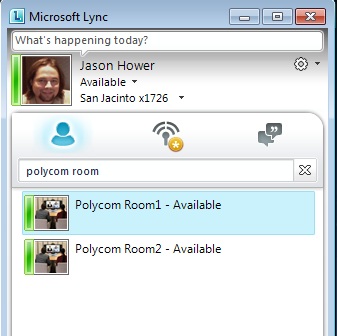
You should be able to head over to the Lync 2010 client and find the room:
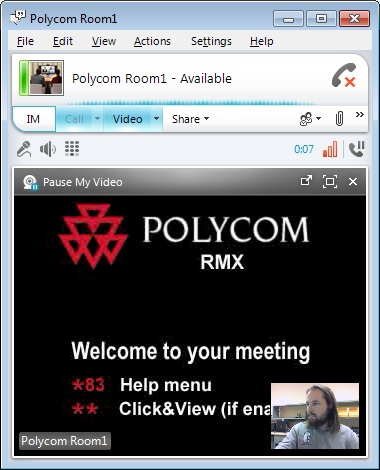
Likewise, you can head over to an HDX endpoint, browse the Global Directory and find the newly registered SIP meeting rooms. This rounds out the Polycom and Lync integration very well, making it easy for users to take advantage of the media rich environment Polycom provides.


